
Install Capell
This guide installs the current 1.x Capell foundation into a Laravel application. Use the Installer package for the normal path: it selects and requires the public packages, runs their lifecycle commands, configures Admin and Frontend, creates the first site and user, and refuses to report success when required health checks fail.
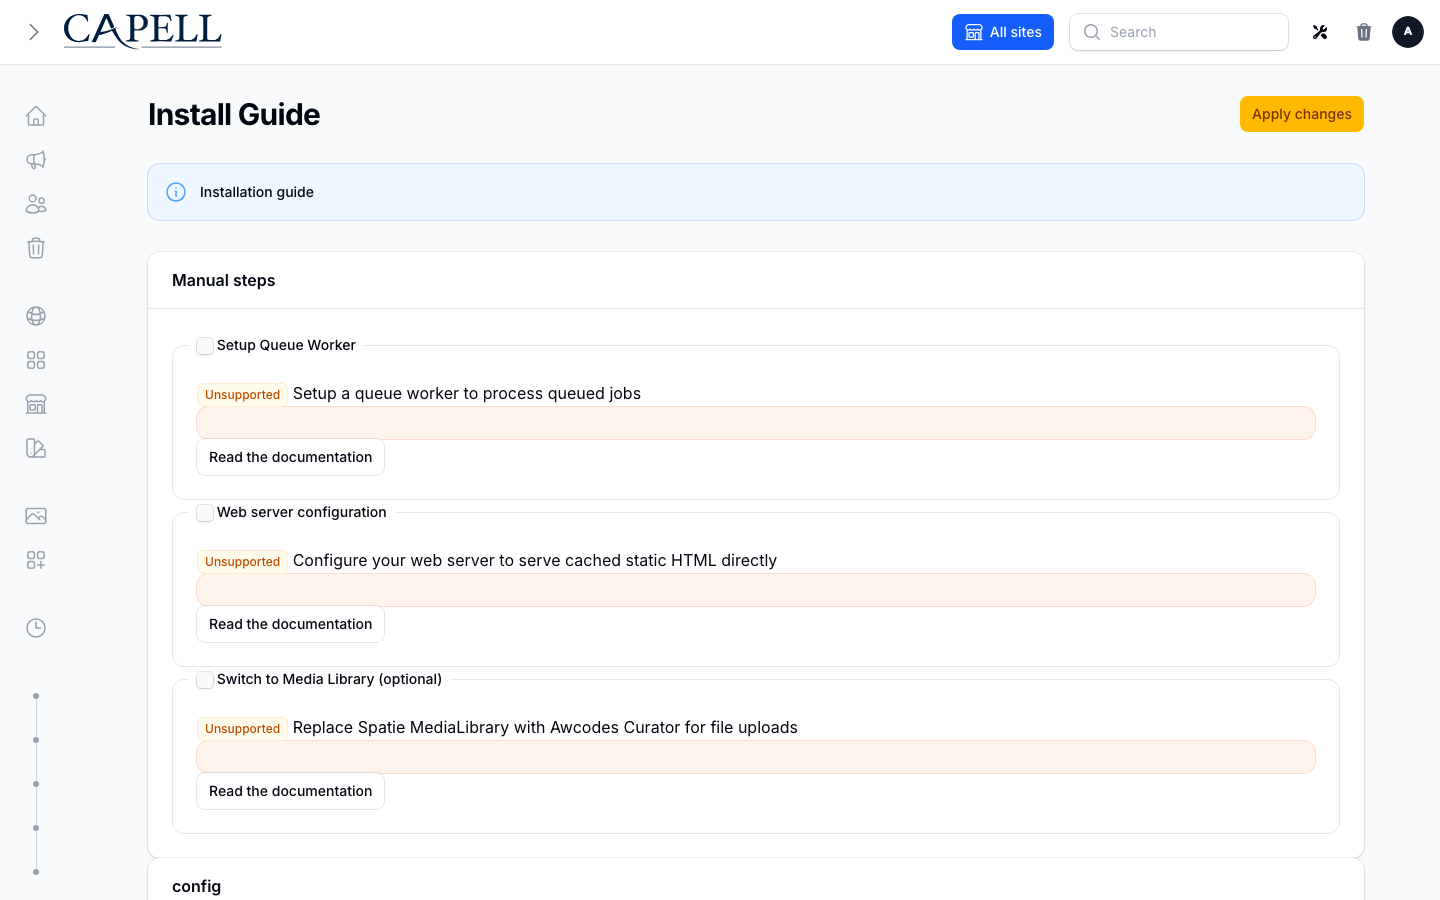
Use the Quickstart for a disposable demo. For an existing application, start at Existing Laravel applications.
Requirements
Section titled “Requirements”| Requirement | Supported value |
|---|---|
| PHP | 8.4+ |
| Laravel | 13.x |
| Filament | ^5.7.6, installed by the selected Admin package |
| Database | MySQL 8+, MariaDB 10.5+, PostgreSQL 16+, or SQLite |
| Node.js | 20+ |
| Composer | 2.7+ |
Required PHP extensions: fileinfo, intl, mbstring, openssl, curl, simplexml, and either gd or imagick.
Before changing an existing application, back up its database and media and confirm that the backup can be read. Capell page history is not a substitute for that backup.
Hosting checklist
Section titled “Hosting checklist”- Capell supports immutable 128 MB shared-hosting limits by running bounded, resumable install steps. It does not inspect or change PHP’s
memory_limit. - Browser requests can time out during Composer or package setup on managed hosting. Reopen the installer to resume the interrupted step, or use
php artisan capell:installfrom the terminal. - A non-
syncqueue needs a persistent queue worker. Laravel’s scheduler is separate and needsphp artisan schedule:runevery minute in production. - Keep
storage/andbootstrap/cache/writable by the web and worker users, and know where the host records PHP and web-server errors. - Process execution (
proc_open) is required for local automated Composer and package lifecycle work. Marketplace readiness reports this before confirmation and changes the call to action to deployment/manual instructions when the limitation is deliberate. Do not bypass the check or increase browser timeouts; enable the process API, use a deployment publisher, or apply the recorded commands during deployment. Database backup commands have their own binary checks. - Database backups shell out to
mysqldumporpg_dump. Slim containers usually ship neither — install them, pointbackup.binaries.*at them, or use SQLite, which needs no external binary. - Installing extensions from the admin UI runs Composer against the application root, so it cannot work on a read-only or immutable deployment. Install extensions during your build instead. Paid packages need a Capell-issued Composer credential that expires 30 minutes after issue (and, when issued for an installation, is bound to that instance and domain), so request it immediately before the build and never bake it into a reusable image or long-lived CI secret. See Paid package access.
- Rebuilding frontend assets from the admin UI needs Node and npm on the server. If your image has neither, build assets in CI and deploy the output.
- Marketplace installs use their own queue. A plain
php artisan queue:workwill not process them — see configuration. - Host-specific Marketplace capability tiers and every readiness remediation are documented in Marketplace hosting.
- Running more than one application node adds requirements of its own, including a shared cache store. Read web server configuration first.
Run php artisan capell:doctor after installing to confirm the environment.
See hosting and installation troubleshooting for the exact errors, checks, worker setup, scheduler command, and log locations.
Fresh Laravel application
Section titled “Fresh Laravel application”1. Create and configure Laravel
Section titled “1. Create and configure Laravel”composer create-project laravel/laravel capell-sitecd capell-sitecp .env.example .envphp artisan key:generateSet APP_URL, database credentials, cache, session, and queue values in .env, then confirm the application can boot and reach its database:
php artisan aboutphp artisan migrate:status2. Install the public foundation
Section titled “2. Install the public foundation”Capell Foundation is MIT-licensed. Core, Admin, Frontend, Installer, and Marketplace install from public Packagist repositories without a Capell account or marketplace credentials.
Paid marketplace packages use separate commercial terms and entitlement-scoped Composer access. The credentials supplied for an entitled customer organisation are scoped to protected packages and are not needed for Foundation.
composer require capell-app/installerPaid package access
Section titled “Paid package access”Paid packages are served from https://capell.app/composer with a short-lived bearer credential that Capell issues for a purchase. The customer account does not reveal one: its Packages page lists the credentials already issued to an organisation (package, creation date, last use, expiry) and lets you revoke them. That section is shown to Owners, Billing members, and members with private Composer access. Credentials are issued by one of two flows:
- Site builder handoff. After purchase, the handoff for the site build lists the commands to run in order:
composer config repositories.capell composer <repository-url>,composer config bearer.<host> <token>,composer requirefor the purchased packages at exact versions, thenphp artisan capell:install --spec=<file> --theme=<theme>. Run those commands as given rather than assembling repository credentials by hand. - Marketplace in Admin. Installing a paid package from Marketplace requests a credential for that installation and passes it to Composer for you, so there is nothing to copy.
To install a purchased package by hand, require that package, not the root package, then run its install step:
composer require <vendor>/<purchased-package>php artisan capell:extension-install <vendor>/<purchased-package>Themes need one further step in Admin: open Sites, edit the site, choose the installed theme in the Theme field, and save.
The credential expires 30 minutes after it is issued and is stored only as a hash by Capell. A credential issued for a single package installation is also bound to that installation’s instance and domain, so it cannot be reused for another site. Composer may retain the supplied credential in its local authentication configuration, so keep that file out of source control and replace the credential when it expires. Never put the token in deployment output, support requests, queue payloads, or application logs.
Do not run filament:install --panels first. The Installer requires and configures the selected Admin package in the correct lifecycle order.
3. Run the CLI installer
Section titled “3. Run the CLI installer”php artisan capell:installThe default interactive flow installs the basic Admin/Frontend foundation and default theme. It asks for the site address and missing administrator details, then offers Confirm all basics and install, Customise settings, or Cancel. The basic flow keeps existing data and homepage routes, skips demo/application seeders and installer removal, and refreshes Capell caches without clearing application data. Existing installations do not offer a database reset in this flow.
Customisation lets you change the site or administrator, choose packages and a theme,
opt into frontend dependency installation/building, choose whether to update APP_URL,
or save a reusable profile. Changes return to the review with previous answers retained.
Choose the full questionnaire or pass --customise for every setting. Explicit package,
profile, demo, fresh-install and other advanced flags retain their detailed flow;
--fresh always requires its destructive confirmation unless explicitly forced.
When the first-site URL differs from APP_URL, the review shows that the application
URL will remain unchanged. Opt into --update-app-url or its customisation choice to
update it after confirmation. Profiles saved with --save-profile=my-settings go into
capell-install-profiles.json, can be reused with --profile=my-settings, and exclude
administrator credentials, URL credentials, query strings and fragments. Config/PHP
profiles retain precedence over JSON profiles; existing named profiles are never replaced.
Frontend builds use the existing frontend installation workflow to detect npm, pnpm, Yarn or Bun, install required dependencies and build assets. Failed installation steps report completed work and a read-only inspection command. An asset failure gives a frontend-only retry command, without repeating package or demo setup. Where Frontend is unavailable, the existing npm build fallback retains its npm recovery command.
Interactive installation asks for the first site’s full URL when --url is omitted,
using APP_URL as the default. Include any port and mount path, for example
https://example.test:8443/blog; site creation stores the scheme, hostname, port and
path separately. Plan previews and unattended installs use APP_URL without a prompt.
Extension choices show explicit catalogue states: Free, Capell licence required, Licence status unavailable, or Currently unavailable. Already downloaded is a separate status and does not imply that an extension is free. Recommended free or already downloaded extensions are selected by default; other downloads require a deliberate choice. For selected paid downloads, an available account connection checks licence coverage for the chosen hostname. An unverified connection can fall back to the Composer access check; a confirmed denial offers retry or deselection. Purchase links are shown for reference, without starting a purchase.
The final review separates selected packages from already downloaded dependencies, counts requested downloads, and lists database, administrator and application changes. Install Capell with these settings? defaults to Yes; choosing No exits without applying the installation. Composer checks downloads before application preparation or database changes, with its diagnostic output retained below actionable access, licence, compatibility or connectivity guidance. For a local Core path repository, targeted downloads explicitly include Core with the application’s existing constraint so Composer can resolve the path package during its partial update.
For a fresh full-foundation install, select:
- all foundation packages;
- the default theme, or no theme when the host application already owns presentation;
- the public site URL;
- a new first administrator;
- cache clearing after installation;
- welcome-route replacement only when Capell should own
/.
The installer may change composer.json, composer.lock, app/Models/User.php, the Filament Admin panel provider, routes/web.php, configuration, migrations, and generated frontend assets. Review the printed plan before accepting changes in an established repository.
For a demo:
php artisan capell:install --demo --url=http://localhost:8000For an unattended disposable smoke install:
php artisan capell:install \ --fresh=force \ --demo \ --package-mode=all \ --theme=default \ --seed \ --url=http://localhost:8000 \ --name="Capell owner" \ --password='replace-this-local-password' \ --clear-cache \ --install-welcome-route \ --no-interaction--fresh=force deletes existing database data. Keep it out of real environments.
4. Read the result correctly
Section titled “4. Read the result correctly”A successful install ends in this order:
Capell Install Health SummaryAll checks passed.✓ Installation complete!Capell Install HandoffThe extension selector uses the current marketplace catalogue, including package names, licence tiers and advertised versions. Selected packages that are absent from Composer are required before fresh-install data deletion, migrations or account creation. The Composer preflight and download use the same constraints; a published beta is requested explicitly for that package rather than lowering the application’s minimum stability. Custom catalogues remain configurable with CAPELL_PLUGINS_SOURCE_URL; changing the source invalidates the old catalogue cache.
Required lifecycle, asset, permission, and health failures stop the command with a non-zero exit code. The installer prints a separate Fix: line for actionable failures and does not print the final success message.
Rerunning capell:install is supported after correcting a failed step. Keep the Installer package present until the health summary is green.
5. Open Admin and the public page
Section titled “5. Open Admin and the public page”Before opening either page, apply the Frontend dependency plan and build production assets unless the installer recorded a successful resource rebuild:
php artisan capell:frontend-after-install --apply --no-interactionThis supported command installs registered dependencies using the application’s detected package manager, prepares the asset inputs, and builds once. It works with the current preparation hook and earlier releases. After it succeeds, start the application; a second npm build is unnecessary. If the installer already recorded a successful rebuild, start the application directly.
Run the Laravel application with your normal local workflow, then open:
/adminfor the admin where editors work;/for the Capell-owned public page when the welcome route was replaced.
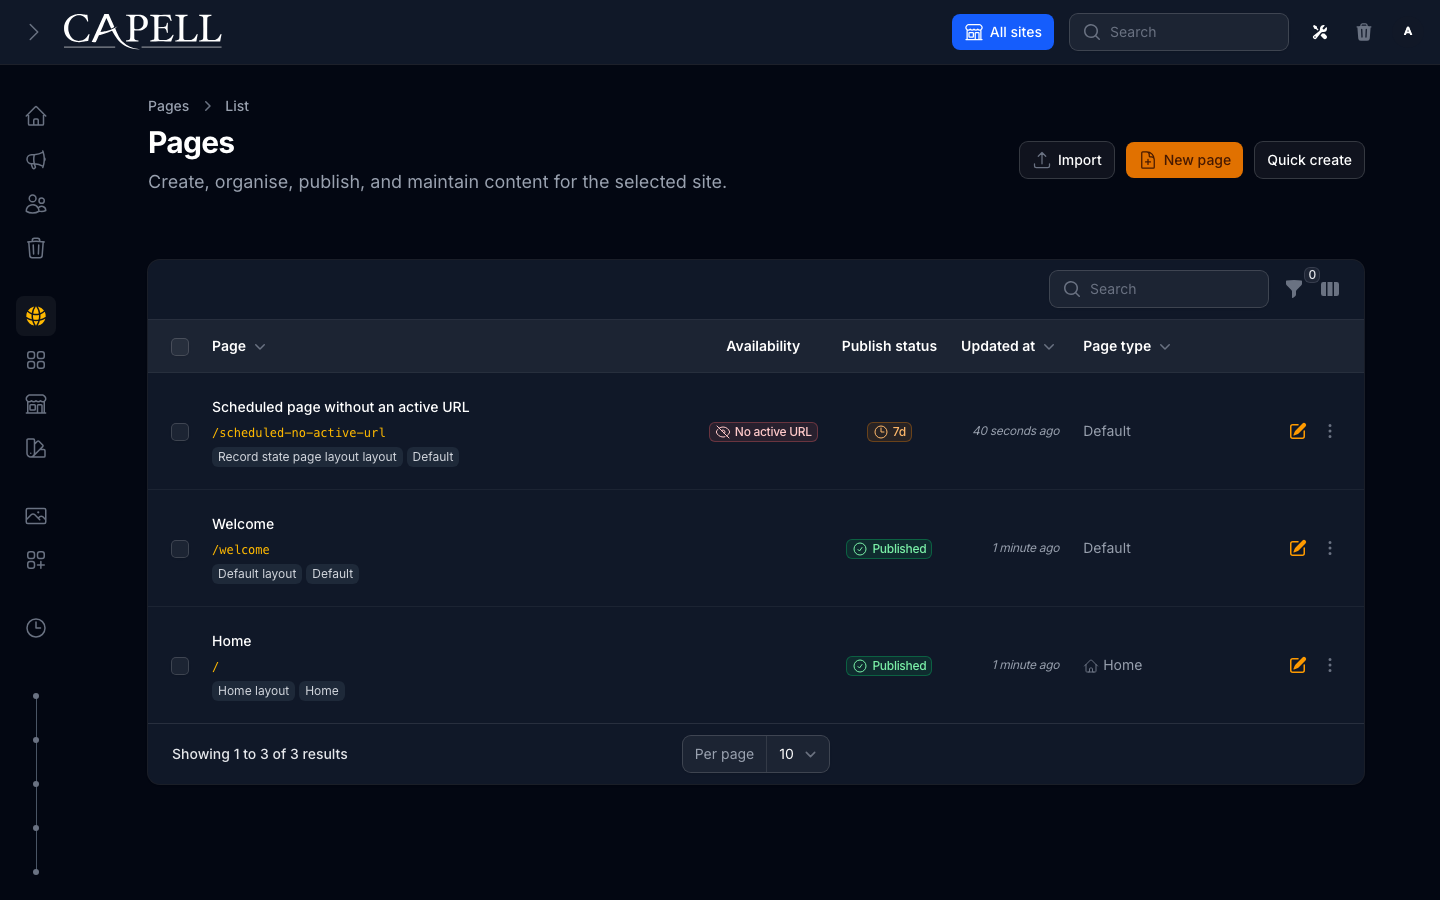
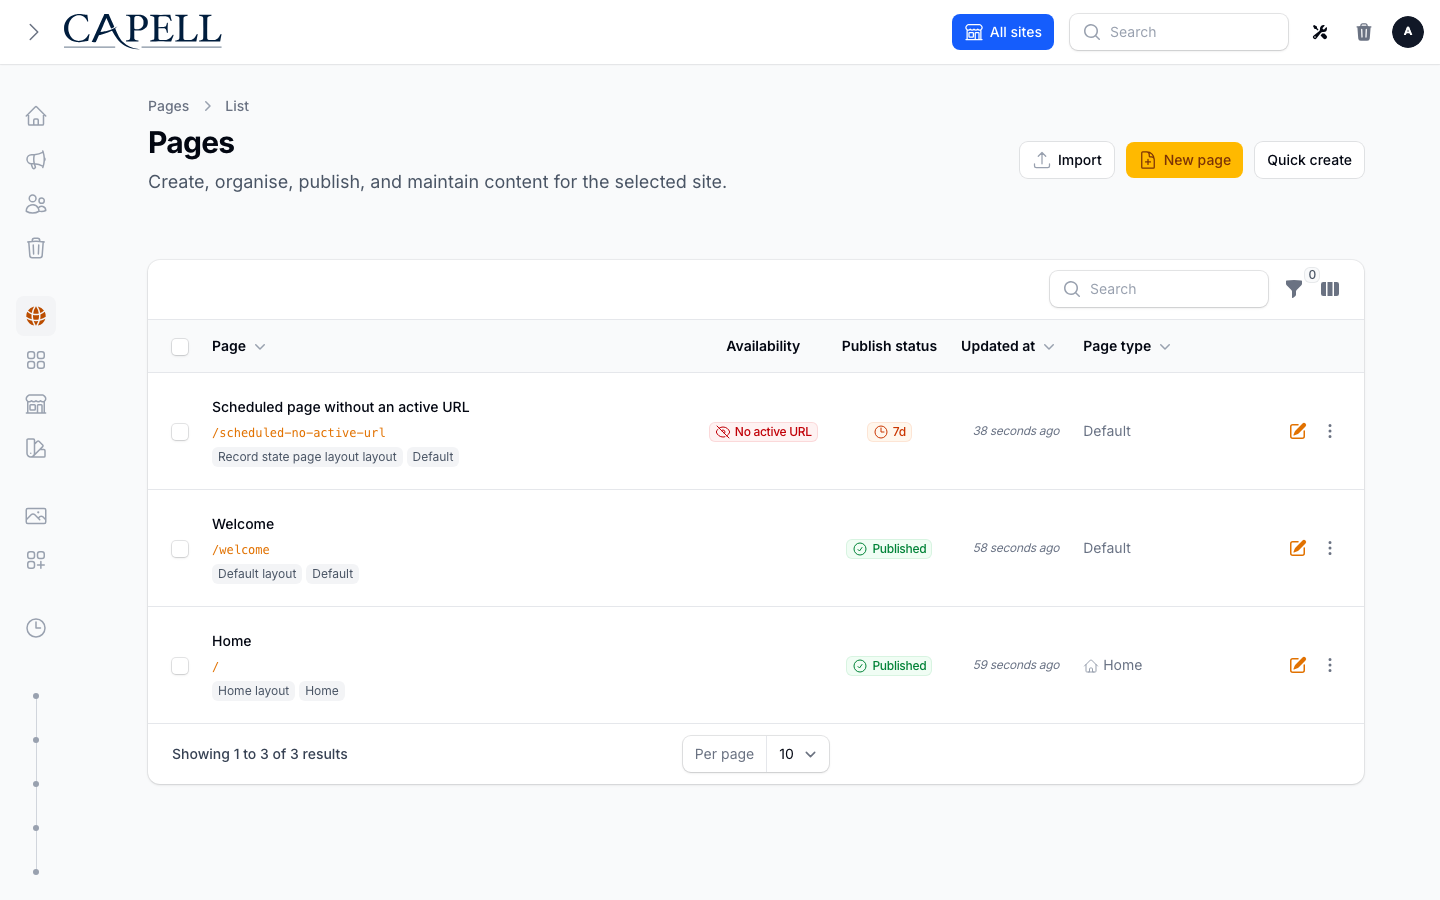
A healthy install reaches the styled Pages resource with the expected records, state, and actions; this is separate from command success alone.
Sign in with the created administrator, then:
- Select the intended site and open Pages. Open a seeded page to edit, or choose New page to create an About or Contact page.
- Follow Create your first page to add useful content, optionally add an image, and save a draft.
- Preview and publish, then open the canonical public URL in a private browser window. Your new text should appear without needing an Admin login.
Reaching /admin or seeing a draft preview confirms only that part of the journey. The anonymous public page is the publication check. If it does not appear, follow the recovery links in the first-page guide.
Browser installer
Section titled “Browser installer”Before using the browser installer, generate an operator secret on the server:
php -r 'echo bin2hex(random_bytes(32)), PHP_EOL; echo time() + 1800, PHP_EOL;'Set the first line as CAPELL_INSTALLER_BOOTSTRAP_SECRET and the second line as CAPELL_INSTALLER_BOOTSTRAP_EXPIRES_AT in the host environment or .env, and rebuild any cached configuration. Open /install over HTTPS and enter the secret in the operator bootstrap field. Each state-changing request requires the proof; the browser session retains its hash, and the server checks expiry and rotation on every request. A missing grant, a secret shorter than 32 characters, an expired grant, or an expiry more than 30 minutes away is refused. Renew both values to resume after expiry, and clear them after setup. Keep the secret out of URLs, logs, reports and source control.
Browser setup preserves existing database data. A destructive refresh is available only through php artisan capell:install --fresh with explicit confirmation (or --fresh=force for a deliberate disposable CLI install).
After requiring capell-app/installer, the temporary /install route offers the same guided setup in a browser. Use it when the web process has permission to write the application files that the selected plan changes.
The browser path is not a way around server permissions or Composer restrictions. On immutable deployments, shared hosting, or containers where PHP-FPM cannot change the release, use the CLI during the build/deploy phase instead.
Remove the Installer only after a green review. The CLI can do that at the end of a successful run:
php artisan capell:install --remove-installerIf an install fails, removal is skipped so the report and retry path remain available.
Existing Laravel applications
Section titled “Existing Laravel applications”An existing application requires an ownership review before installation:
- Back up the database and media and record the restore command.
- Identify routes that must remain ahead of Capell’s public routes, especially
/. - Identify the existing user model, authentication, Filament panels, roles, and policies.
- Decide whether Capell Frontend should own public page delivery or whether the app will integrate Core/Admin only.
- Run the install plan without changing the application.
composer require capell-app/installerphp artisan capell:install --planThen run the guided installer and select only the required foundation packages. Point --user at an existing user when that account should be the default author:
php artisan capell:install \ --url=https://your-site.test--user does not create an account. To create a new administrator non-interactively, pass --name, --email, and --password together.
Review the Installer’s changes to the user model and Filament panel provider before committing them. Preserve host authentication, existing routes, policies, middleware, and frontend assets that Capell does not own.
Manual package selection
Section titled “Manual package selection”Use this path when a build pipeline must pin the package set before Artisan runs. Core is the foundation dependency; Admin, Frontend, and Marketplace are separate responsibilities.
# Full public foundation without the temporary Installer packagecomposer require \  capell-app/core \  capell-app/admin \  capell-app/frontend \  capell-app/marketplace \  -W
php artisan capell:install --package-mode=all
For an internal application that deliberately has no Capell public delivery layer:
composer require capell-app/core capell-app/admin -Wphp artisan capell:install --packages=capell-app/admin --theme=noneThis is a Core/Admin installation, not a headless CMS product and not a public content API. The host application owns any content integration it builds around Core.
Useful installer options
Section titled “Useful installer options”| Option | Purpose |
|---|---|
--customise | Open the full installation questionnaire |
--build-assets | Install frontend dependencies and build with the detected manager |
--update-app-url | Update APP_URL to the reviewed site URL after confirmation |
--save-profile=name | Save reusable settings without administrator credentials |
--plan | Print the resolved install plan without changing the application |
--demo | Seed the verified evaluation content |
--package-mode=core|all|custom | Select the distribution scope |
--packages=... | Select installed Capell package names explicitly |
--all-packages | Run lifecycle setup for every Composer-installed Capell package |
--theme=default | Use the verified default theme |
--theme=none | Install without activating a theme |
--url=https://... | Set the site URL without a prompt |
--name= --email= --password= | Create the first administrator; pass all three |
--user=email-or-id | Select an existing default author |
--seed | Run the host application’s database seeder |
--clear-cache | Clear Laravel and Capell caches after installation |
--install-welcome-route | Remove Laravel’s stock welcome route so Capell can own / |
--remove-installer | Remove the temporary Installer only after success |
--handoff-json=path | Write a redacted machine-readable install handoff |
--fresh / --fresh=force | Rebuild the database; destructive |
--production | Force unattended production-safe mode and refuse --fresh |
Use php artisan capell:install --help for the authoritative option list in the installed release.
A successful run also prints a Capell Install Handoff with the selected packages, verified outcomes, safe Admin/public URLs, first-page state, warnings, and one next action. For release automation, pass --handoff-json=storage/app/capell-install-handoff.json; the JSON uses the same versioned, redacted contract and does not connect a Capell account or submit a telemetry identity.
Themes and frontend assets
Section titled “Themes and frontend assets”The default install runs the Frontend lifecycle and generates Capell’s Tailwind entry assets. If an existing application needs to regenerate them explicitly:
php artisan capell:frontend-installThe Frontend after-install lifecycle prepares registered dependencies in package.json, generated CSS, and the Vite input manifest. Preparation does not install Node dependencies or build assets. For an optional prepared CI or host asset pipeline, first ensure that the registered dependency plan has been written to package.json and the generated CSS/Vite input manifest is present. Then run the application’s package manager install and production build. For npm:
npm installnpm run buildWhen preparation has not already completed, explicitly run php artisan capell:frontend-after-install --apply --no-interaction. This applies registered dependencies and builds assets; without --apply, non-interactive use is report-only. Browser installation runs Node only when Rebuild resources is selected. That installer build path supports npm; pnpm, Yarn, and Bun hosts should leave it unselected and use the explicit Frontend command or their normal package manager install/build after preparation. A completed setup/doctor handoff alone does not verify built assets.
Do not copy package-specific Tailwind paths from an unrelated project. Use the generated entry file and the installed package’s documented integration.
Choose optional themes only from a listing that states a released Composer path, compatible Capell line, screenshots, install command, support boundary, and removal path. Source-only examples and Labs packages are not part of this installation guide.
Install-time write permissions
Section titled “Install-time write permissions”The install user needs write access to the paths selected by the plan. Common paths are:
.env;composer.jsonandcomposer.lockwhen packages are added or removed;app/Models/User.php;app/Providers/Filament/AdminPanelProvider.php;config/,routes/web.php, anddatabase/migrations/;resources/css/filament/admin/and generated frontend CSS;storage/,bootstrap/cache/, andpublic/asset links.
Prefer running Composer and Artisan as the deployment user that owns the release. Do not make the whole application writable by the web process. After installation, retain only normal Laravel runtime write access to storage/, bootstrap/cache/, and any configured generated-output directories.
Set CAPELL_RELEASE_ROOT_MODE to match the deployed layout:
mutableaccepts a directly addressed checkout or build root when every target path is writable. SetCAPELL_SERVER_SIDE_TOOLING=trueas well only when the running server is deliberately allowed to install Marketplace extensions itself.immutablecovers read-only containers and serverless-style releases. Runtime Composer and migration publication are blocked; apply them while building the next image or release.atomiccovers acurrentsymlink pointing at versioned releases. Runtime release-root writes are blocked even when the target directory is writable, preventing a long-running request from modifying the old release after promotion.
Capell also detects symlink components in a root declared mutable and blocks the write. Do not work around this protection by making versioned release directories writable.
Production verification
Section titled “Production verification”Putting the installation on a public domain — DNS records, TLS, trusted proxies behind a CDN, and the queue worker and scheduler as supervised processes — is covered in Going live. Work through that page first; the checks below assume it is done.
Before sending traffic to the installation:
php artisan optimize:clearphp artisan capell:doctorphp artisan capell:upgrade --dry-runAlso verify:
- the administrator can sign in and the Pages workspace is styled;
- a published page returns 200 on the canonical domain;
- the queue worker and scheduler are running when the selected packages need them;
- database and media backups are enabled, offsite, monitored, and restorable;
- no optional package reports an unresolved health, compatibility, or removal issue.
Read Site Health, Upgrading, and Backups before launch.
Troubleshooting
Section titled “Troubleshooting”| Symptom | First action |
|---|---|
| Installer cannot write a file | Correct ownership for the specific path, then rerun the installer |
| Admin command or page is missing after Composer | composer dump-autoload && php artisan optimize:clear |
| Frontend CSS is missing | php artisan capell:frontend-install, then the host npm build |
| Public content is stale | Use Admin Clear Cache, then inspect the installed cache package |
| A queued task never finishes | Follow the queue worker checks |
| Scheduled work never runs | Configure the Laravel scheduler |
PHP reports Allowed memory size ... exhausted | Reopen the installer, identify the failing step in its report, and report it as a batching defect |
| Install health remains red | Run the printed Fix: command and php artisan capell:doctor |
Continue with Operations troubleshooting when the first action does not resolve the cause.